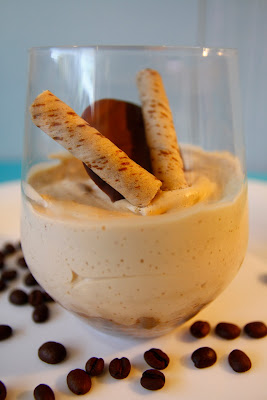
Saturday 28 July 2012

Bread and Butter pudding


This is a simple and traditional dessert, although the rooibos raisins add a slight variation and delicious new flavour.

Bread and Butter pudding
170g raisins soaked in rooibos tea
300ml Cream
375ml (1 tin) evaporated milk
4 egg yolks
50g castor sugar
8 sliced of white bread
125ml apricot jam
5 ml vanilla essence
1 teaspoon vanilla bean paste
1.     Grease an oven proof tray, around 25cm, sprinkle some soaked raisins over the bottom.
2.     Spread apricot jam over your slices of bread.
3.     Slice the pieces into whatever size you prefer, they shouldn’t stick out too much over the top of the tray.
4.     Lay the bread neatly in your dish and sprinkle the rest of the raising in-between each slice.
5.     In a sauce pan bring cream and half the evaporated milk to a boil.
6.     In a jug or small bowl, beat egg yolks, sugar, vanilla essence and excess evaporated milk. 
7.     Pour mixture into the heated cream and stir thoroughly until it just slightly thickens.
8.     Remove from the heat and pour over your bread, if it seems too full, let the bread soak up some custard and then add more.
9.     Place in a water bath and turn oven to 160C, bake for around 45 minutes. Don’t over cook the custard or it will turn eggy.
10. Serve warm and simply on its own.

This is great if you have left over bread in the house that is beginning to go stale. Most of the ingredients will be in you pantry already so it’s easy to make anytime. Don’t be afraid of the rooibos tea, it just gives a subtitle flavour and isn’t overpowering. If you don’t have rooibos in your house simple soak the raising in boiling water until they swell.

Tuesday 24 July 2012

Vanilla custard

Homemade custard is something everyone should know how to make. It's so thick and creamy, you will never use bought custard again. It is so simple and so delicious.
Vanilla custard
1 cup full cream milk
1 tablespoon custard powder
1 egg
1 teaspoon vanilla bean paste
¼ cup extra full cream milk

1.     Heat 1 cup of milk and vanilla bean paste in a sauce pan until its steaming.
2.     In a small bowl beat egg, custard powder, sugar and ¼ cup milk until its well combined.
3.     Four half the steaming milk into the bowl and stir together, then pour it back into the pot. Continue stirring until it thickens.
4.     Store in an airtight container in the fridge.

It’s perfect for any dessert or pie that requires custard, or simply on its own. Its very easy and takes no time at all.

Wednesday 18 July 2012

Chicken Laksa Soup


This is completely home made, that means there’s nothing bad in it, just vegetables and healthy goodness. It has a lovely curry flavour which warms the whole body. Its perfect for dinner in winter.

Chicken Laksa Soup
500g chicken cubed
4 cups water
a tin of coconut milk
2 tablespoons of soy sauce
250g egg noodles
3 Bokchoy
4 carrots
3 sprigs of spring onion
200g pumpkin

Luksa Paste
1 tablespoon coriander seeds
1 tablespoon cumin seeds
1  teaspoon nutmeg
1 tablespoon curry powder
1 large red chilli
1 onion
2 glove garlic
1 teaspoon turmeric
2 tablespoons ginger
a handful of coriander stems
1.     Place the paste ingredients in a food processor and blitz until it forms a smooth paste.
2.     Scrape the paste out of the processor into a deep pot, turn the heat on low and cook.
3.     To the pot add sliced carrot, chopped pumpkin and water. Place lid on top and cook until carrot and pumpkin are soft (a pressure cooker helps to speed up the process)
4.     Once fully cooked add chopped spring onion and bokchoy, allow them to cook and then turn off the heat. Now add the coconut milk, the heat must be off to stop it form curdling. Then add the soy sauce.
5.     In a separate pan, pan fry your chicken in a bit of vegetable oil, cook until caramelised and cooked through. Then add to the large pot.
6.     In a bowl of boiling water, loosen your egg noodles. Once they have softened, drain the water and add them into your large pot.  
7.     Reheat when you are ready to serve and enjoy.

If anyone is vegetarian you can leave the chicken out. You could also use fish or beef if you prefer. If you aren’t used to eating spicy food, leave out the chilli and add less curry paste.

Tuesday 17 July 2012

Chocolate Tiramisu Cheesecake


Chocolate, coffee, kahlua and cheesecake what could possibly be better? This cheesecake is rich and creamy with a delicious chocolate base, its absolutely magnificent.

Chocolate Tiramisu Cheesecake
250g cream cheese
100ml castor sugar
2 eggs separated
10ml gelatine
25ml Kahlua/ tiamaria
50ml warm coffee (espresso/ instant)
pinch salt
200ml whipping cream
100g dark chocolate

Crust
½ packet shortbread biscuits
50g chocolate
75g melted butter
 
1.     Crush biscuits using a food processor, if you don’t have one then use a rolling pin, until the biscuits have turned to crumbs.
2.     In a small pot toss butter, chocolate and biscuit crumbs until the butter and chocolate have melted.
3.     Then spoon into your cake tin/glasses. Lightly press down to create an even surface. Then set aside to cool.
4.     Using an electric beater beat egg whites with a pinch of salt until they form stiff peaks. Set aside.
5.     In a separate large bowl beat cream until firm but not too beaten, it should still be slightly runny.
6.     In another bowl beat cream cheese, egg yolks, and sugar until creamy.
7.     In a mug or small bowl soften gelatine in kahlua then add the warm coffee and place in the mug in a bowl of boiling water so the gelatine dissolves.
8.     Drizzle the gelatine and coffee mixture into the cream cheese mixture. (it’s best if you slowly drizzle into the beaters)
9.     Once combined, fold cream and egg yolks into the cheese mixture.
10. Pour onto crust and place in the fridge to set, this usually takes around 3-4 hours.
11. Decorate with melted chocolate once set.

I sometimes make this recipe in little cupcake holders and then freeze them in an airtight container so that they are ready to eat whenever you feel like one; I even eat them frozen sometimes. They are great fresh or frozen, and can be done in one large tin or in smaller glasses. It’s a great dessert for a dinner party or as a birthday cake.

Sunday 15 July 2012

Granny’s Vegetable Soup


My Great Grandmother has been making this soup since my mother was a child. Its been adapted and changed slightly but still has the same delicious comforting feeling.
Granny’s Vegetable Soup
1 leek
1 clove of garlic
2 celery sticks
3 carrots
1 turnip peeled
1 parsnip peeled
1 potato
1 tin of four-bean mix
500g pumpkin or butternut
1 tin diced tomatoes
2 cubes of chicken stock
200g bacon or chicken sausages or other slow cooking meats
Boiling water
Salt and pepper to taste

1.     Thoroughly wash leek, then chop it and put it in a deep pot (I use a pressure cooker) to cook until they have softened slightly, then crush garlic into the pot.
2.     Chop celery and carrots roughly but not too large and add them to the pot on a low heat.
3.     Grate your turnip and parsnip (they are best grated because their flavours can be overpowering in large chunks). Then add them to the same pot.
4.     Roughly chop your potato and butternut, as large or small as you like and add it to the pot. (Remember the larger they are the longer they take to cook)
5.     Then add four bean mix (including the juices), tin of diced tomatoes, chicken stock cubes, and your chosen meat. Now add your boiling water, the water should cover all the vegetables in the pot but come ¾ of the way up the pot. Be careful not to overfill it if you are using a pressure cooker.
6.     Give the pot a stir and then place the lid on. In a pressure cooker the soup will take around 15-20 minutes and a further 5 minutes to cool before you can safely open the lid. In a normal pot it will take around 45 minutes, but that depends on your vegetable size, so simply cook until the vegetables are soft. Season to taste.
7.     It’s yummy with grated cheese on tip and buttered bread on the side. Store it in the fridge in an airtight container and enjoy throughout the week.

During winter we keep a constant supply in the fridge because it’s a perfect winter lunch and is packed with healthy vitamins, it’s a very balanced meal. If you are vegetarian then leave the meat out, it’ll still taste great.

Shortbread


This is a traditional Scottish biscuit, its light and crumbly in texture. Its great to keep in your cupboard and it’s yummy for anytime of the day.

Shortbread
185g soft butter
110g icing sugar
250g flour
124g corn flour

1.     Mix the softened butter and icing sugar very well, until butter is light and creamy.
2.     Sift flour and corn flour into the bowl and knead very well, until the dough comes away from the sides of the bowl
3.     Place in a baking tin, about 2cm thick and press down using your fingers. Prick around the dough using a fork or thin metal skewer.
4.     Bake in the oven at 140C for 50-60 minutes until the surface has turned pale brown.
5.     Cut into long fingers and sprinkle castor sugar over the surface. Allow it to cool before removing from the tray.

This recipe makes an average amount, its great for taking to a friend’s houses for tea or for young children.

Saturday 7 July 2012

South African Rusks


Rusks are a crunchy, hard and dry biscuit originally from the Dutch settlers in South African. They are absolutely delicious with coffee or milky tea, perfect for morning tea snacks or late night nibbles. 

Healthy Rusks
450g whole meal flour
100g flax-seed meal
100g shaved coconut
½ cup oat bran
1 cup all bran flakes (or any other bran type cereal)
4 wheatbix biscuits (crushed)
½ cup sunflower seeds
5ml salt
5ml bicarbonate soda
25ml baking powder
¾ cup sugar
250 g margarine (stork or nuttelex)


400ml buttermilk (plain natural yogurts works well too)
1 egg
½ cup raising or sultanas

1.     In a large bowl mix flour, flax-seed meal, coconut, oat bran, bran flakes, wheatbix, sunflower seeds, salt, bicarbonate soda, baking powder and sugar.
2.     Rub in your margarine into your dry ingredients, making sure the margarine is broken up.
3.     In a jug measure out your buttermilk, raisins and 1 egg, roughly stir together. Add this mixture to your bowl and mix until combined.
4.     Set your oven to 175C. Spread your mixture over a large baking tray leaving the mixture about 2cm thick (place baking paper underneath to prevent sticking). Place in the oven and bake for 20 minutes.
5.     After 20 minutes the tops should be golden and the inside should have a cake-like consistency. Flip the entire tray onto another tray, it helps if you have two of the same size but isn’t necessary. Then place them back into the oven for 15 minutes or until the other side has turned golden.
6.     Remove the tray from the oven. Turn the temperature right down to 60C. Allow the tray to cool slightly, then using a sharp knife, gently cut rusks into equal sizes (whatever size suits you). Place them back onto a tray on their sides and back into the oven, I find the come out best when you leave them in an oven of 50-60C over night or for 4 hours.
7.     When they are done they should be dry and crunchy with no moisture inside. Place in an airtight container for storage.

They are best dipped in hot coffee in the early mornings. These will last in your cupboard for ages. The ingredients can easily substituted for whatever is in your cupboard like nuts or other cereals and grains. They do take a while to make but they are well worth the effort.

Wednesday 27 June 2012

Vanilla Cake

-->
Some of my earliest and greatest memories come from this recipe, from licking the batter out of the bowl as a child to cupcakes at birthday parties. It’s a recipe that’s been passed down from my grandmother to me, and it’ll definitely be passed down to my grandchildren, it’s the perfect vanilla cake recipe.
Vanilla Cake
230 grams margarine
1 ½ cups sugar4 eggs
4 cups self-rising flour
2 teaspoons baking powder
A pinch salt
2 cups milk
3 teaspoons vanilla essence

1.     In a large bowl cream your margarine and sugar until they become light in texture and the sugar has dissolved slightly.
2.     To the bowl add your eggs one at a time; allow them to beat in before adding the next one. Beat until the mixture becomes light and fluffy.
3.     In a separate bowl sieve flour, baking powder and salt. In a jug measure out milk and vanilla essence.
4.     Using a (K) beater or spatula, fold in flour and vanilla. I slowly pour the milk whilst adding tablespoons of the flour mixture; this prevents the mixture from becoming lumpy. Be careful not to over mix your batter because the cake will crack.
5.     Pour your mixture into a greased cake tin or cup cake tin. Bake at 180C 15-20 minutes for cupcakes and around 35 minutes for a cake depending on the tin.
6.     Once cool decorate with butter icing, cream cheese icing or as a Victoria sponge.

This is really versatile and can be used as a base for any child’s birthday cake or simple for afternoon tea. The cake is really moist and has a delicious vanilla flavour; everyone who tries it loves it.

Saturday 23 June 2012

Mulva Pudding


My Gran mother made this pudding for my family for Sunday afternoon tea, it is such a lovely warm and comforting dish. It’s a traditional South African dessert that is really worth trying.
Mulva Pudding
1 cup Self raising flour
½ cup soft brown sugar
1 egg
1 cup carnation milk
a pinch salt
2 tablespoons brown vinegar
2 tablespoons apricot jam
1 teaspoon bicarbonate soda
1 teaspoon baking powder
serves 8

Sauce
½ soft brown sugar
½ cup carnation milk
½ boiling water
2 tablespoons butter
1 teaspoon vanilla essence

1.     Beat eggs and brown sugar in a bowl until the eggs turn a light yellow colour.
2.     Sift flour, bicarbonate soda, baking powder, and salt, then add wet ingredients and mix until the batter combines and is smooth.
3.     Spoon mixture into either little ramekins or one large pudding dish, they will rise a fair bit so don’t fill them all the way to the top.
4.     Bake in the over at 180C for 15-20 minutes (depending on your dish size)
5.     While the pudding is in the oven you can begin your sauce.
6.     In a saucepan add all your ingredients and stir until the butter is melted and the sugar has dissolved, then set aside.
7.     Once the puddings are done, drizzle the sauce evenly over the top and leave them to soak it all up. Serve while they are still warm.

This is best served with cream, custard, ice cream or all three. It’s a simple pudding that everyone will love. Don’t be alarmed by the vinegar, that is simply to help the pudding rise, you wont taste it at all in the end. It doesn’t contain much fat or sugar so its not a bad option for people who are health conscious.

Thursday 21 June 2012

Carrot Cake


This is a classic cake, it’s amazingly moist and the creamy icing on top is to die for. Its perfect to share with guests for afternoon tea. 

Carrot Cake
2 cups flour
¼ cups sugar
3 eggs
1/3 teaspoon baking soda
1 ½ teaspoons baking powder
1 teaspoon cinnamon
1 teaspoon nutmeg
½ teaspoon salt
2 ½ cups carrots grated and tightly compacted
¾ cup sunflower oil
Makes 12 muffins or one cake 

Cream Cheese Icing
100g margarine
200g cream cheese
1 teaspoon vanilla essence
500g of icing sugar (+/- it varies depending on the temperature)

1.     Crack eggs into a mixing bowl and beat until they turn a pale yellow. Measure out your sugar and slowly drizzle it into the eggs so that they hold their form. Do the same with the oil. Your mixture should be very light and fluffy.
2.     Grate your carrots, you want them to be compacted into your measuring cups so that your cake is moist, using the freshest carrots are always best too. Add any juice that drains from your carrots into the bowl along with the carrots.
3.     Sift flour, baking powder, nutmeg, cinnamon, salt and baking soda into the bowl. Then fold/mix in until all your ingredients have combined. Do not over mix or you will lose the light texture.
4.     Spoon into muffin ting or into one large cake tin (whatever you prefer) and bake at a preheated oven of 175C. Cup cakes take around 15 minutes and a full cake will take between 25-30 minutes. Check your cakes regularly because all ovens vary.
5.     To make the icing, beat margarine and cream cheese in a bowl until smooth. Then add the icing sugar slowly until it comes together, taste to see how much icing sugar you need, it shouldn’t taste too much of cream cheese. Then add your vanilla essence and beat until combined.
6.     Once the muffins are cooked allow them to cook before icing them and topping off with delicious walnuts.

If you have left over icing you can pop it into an airtight container and store in the freezer for next time. It can be used on any cake you like, and it’ll be delicious.